
Adding texture to packaging makes products pop.
Two ways to do this: debossing and embossing. Look similar, work completely opposite. One pushes down into material, other raises up from it. Different visual punch, different price tags, works better on different stuff.
Customizing packaging or fabric? Knowing which method fits your situation saves cash and gets better results. Here’s the real story on deboss vs emboss.
Table of Contents
| # | Section | Key Points Covered |
| 1 | What is Debossing? | How it works, what it looks like |
| 2 | What is Embossing? | Process details, visual effects |
| 3 | Key Differences Between Deboss and Emboss | Direct comparison |
| 4 | Deboss vs Emboss on Packaging | Box and label applications |
| 5 | Deboss vs Emboss on Fabric | Textile uses, what works |
| 6 | Cost Comparison | Price breakdown |
| 7 | Durability and Longevity | Which lasts longer |
| 8 | Best Materials for Each Technique | What works where |
| 9 | When to Use Debossing | Best scenarios |
| 10 | When to Use Embossing | Ideal situations |
| 11 | Common Mistakes to Avoid | What goes wrong |
| 12 | Final Thoughts on Deboss vs Emboss | Bottom line |
deboss vs emboss– What is Debossing?
Debossing pushes your design into the material. Creates a dent below the surface.
Like stamping into wet clay. Image goes down, not up. That’s debossing.
The process:
Metal die with your logo or text presses into material using heat and pressure. Makes a permanent dent. Everything around it stays flat while your design sinks.
How it looks:
Subtle. Classy. You feel it when you touch it. Design catches shadows in the low spots, makes it visible without color.
Works great on paper, cardboard, leather, some plastics. People use it for nice packaging, business cards, book covers, leather stuff.
Doing packaging optimization for premium products? Debossing adds that expensive feel without screaming about it.
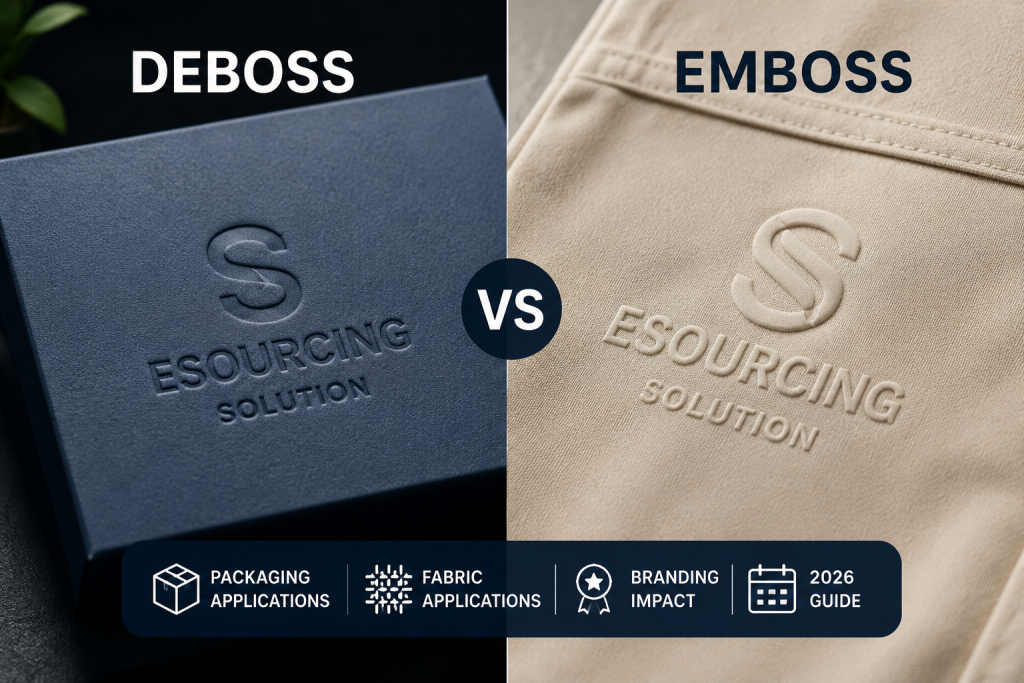
What is Embossing?
Embossing does the opposite. Raises your design above the surface.
Like pushing something up from underneath. Design sticks out toward you.
The process:
Two dies working together. One pushes from behind, one pushes from front. Material gets squeezed between them, forces your design upward. Heat and pressure lock it in.
How it looks:
Bold. Pops out. Grabs attention. Design literally stands off the surface. Light hits the raised parts differently, creates contrast.
Types:
Blind emboss (no color, just raised), registered emboss (combines raised with color for fancy effects), multi-level emboss (different heights for complex looks).
Shows up on greeting cards, wine bottles, fancy packaging, invitations, fabric patches.
Working with a China sourcing agent? Tell them exactly which you want. Lots of suppliers pick one based on what machines they own.
Key Differences Between Deboss and Emboss
Here’s how they stack up:
| Aspect | Deboss | Emboss |
| Direction | Pushes in | Sticks out |
| Look | Subtle, recessed | Bold, raised |
| Feel | Dip inward | Bump outward |
| How visible | Uses shadows | Catches light |
| Vibe | Sophisticated, quiet | Flashy, luxe |
| Toughness | Super durable | Wears faster |
| Price | Cheaper usually | Costs more |
| Materials | Works on most things | Needs thicker stuff |
Core difference: Deboss goes in. Emboss comes out. Everything else follows from that.
Both add texture without needing ink (though you can add that). Both need custom dies. Both feel premium when you touch them.
Deboss vs Emboss on Packaging
Both work on packaging. Results differ though.
Debossing on packaging:
Great for boxes, rigid containers, labels, paper bags, cardboard mailers. Looks elegant and understated. Won’t catch on other packages during shipping. More durable because nothing sticks out to get smashed.
Where you see it: High-end cosmetic boxes, nice retail bags, premium product packaging, subscription boxes.
Embossing on packaging:
Makes stuff pop on boxes, labels, bags, cartons. More dramatic. Perfect for grabbing eyes on shelves.
Where you see it: Wine boxes, gift packaging, special editions, luxury items.
Real talk:
Packaging gets beaten up during shipping? Go with debossing. Sitting on a store shelf competing? Embossing wins.
Doing bulk product sourcing from China? Check if your factory does both or just one. Some places specialize.
Deboss vs Emboss on Fabric
Fabric’s different than paper.
Debossing on fabric:
Less common but works on leather, faux leather, thick felt, dense fabrics. Good for logos on labels, leather patches, bag details.
Fabric needs body to hold the dent. Thin or stretchy stuff won’t work. Depression can flatten over time with washing and wear.
Embossing on fabric:
More versatile for textiles. Works on leather to synthetics to thick cotton. Creates texture patterns, logos, decorative bits.
Common on: Leather goods, upholstery, vinyl stuff, patches, garment details, shoes, bags.
Heat embossing works great on synthetic fabrics. Heat melts the material slightly while forming the raised look. Permanent texture.
Washing concerns:
Embossed fabric can flatten with washing or heavy use. Product gets washed a lot? Simpler techniques like screen printing might work better.
Running quality control on fabric products? Test embossed details through wash cycles to check durability.
Cost Comparison
Both need setup investment. Ongoing costs vary.
Setup (both methods):
Custom die creation: $100 to $500 based on size and how complex. One-time thing. Keep the die for future orders.
Per-piece costs:
Debossing:
Usually $0.10 to $0.50 per piece for basic designs on packaging. Lower because one die, simpler equipment.
Embossing:
Typically $0.20 to $0.75 per piece. Higher because needs matched dies plus more precise machines.
What affects price:
How complex your design is, material type, how many you’re making (bigger runs = cheaper per piece), adding colors or foil.
Hidden stuff:
Embossing needs thicker materials so they don’t tear. That bumps your base material cost. Debossing works on thinner stuff, saves money there.
For supplier negotiation and cost optimization, know these details before getting quotes. Some suppliers overcharge.
Durability and Longevity
Which holds up better?
Debossing durability:
Really durable. Recessed design is protected. Nothing sticking out to rub off or get crushed. Can last forever basically.
Best for: Things people touch a lot, items that stack, packaging that needs to last.
Embossing durability:
Good but not as tough. Raised part can flatten over time with pressure or rubbing. Edges can wear down. Heat and moisture mess with it more.
Best for: Display packaging, one-time-use stuff, products in protective wrapping, things that won’t get beat up.
Environment stuff:
Heat softens embossed designs. Cold makes them brittle. Moisture hurts paper embossing more than debossing.
Product shipping worldwide through global sourcing and facing crazy temperatures? Factor that in.
Best Materials for Each Technique
Not everything works with both.
Best for debossing:
Thick paper (300gsm+), cardstock, chipboard, leather, faux leather, certain plastics, rigid paperboard, book cloth.
Best for embossing:
Medium to thick paper (250gsm+), cardboard, some synthetic fabrics, vinyl, certain plastics, metallic sheets, leather.
Doesn’t work:
Thin paper tears. Really hard plastics won’t form right. Super stretchy fabrics won’t hold shape.
Thickness matters:
Embossing needs material thick enough to push up without ripping. Too thin? Tears. Too thick? Won’t form the design.
Debossing is easier. Works on thinner stuff because you’re just compressing, not raising.
Testing:
Always test on your actual material before big production runs. What works on one paper might fail on similar-looking paper.
Managing product idea development? Test both techniques early with your real materials.
When to Use Debossing
Debossing makes sense when:
1. Going for subtle elegance
Want sophisticated, not flashy. Debossing feels refined.
2. Durability matters
Stuff that gets handled lots, stacked, compressed. Recessed design survives rough handling.
3. Thinner materials
Substrate too thin for embossing but you still want texture.
4. Dark colored materials
Debossing creates gorgeous shadows on dark surfaces. Works without adding color.
5. Watching budget
Want texture but need to control costs. Debossing’s typically cheaper.
6. Minimalist look
Clean, modern vibe where less is more. Adds interest without visual noise.
When to Use Embossing
Embossing works better for:
1. Maximum visual punch
Packaging needs to stand out on retail shelves. Embossing grabs eyes.
2. Light colored materials
Raised designs on white or light stuff create dramatic shadows and depth.
3. Luxury positioning
Premium products where you’re justifying higher prices. Embossing signals quality.
4. Combined with foil or color
Registered embossing (raised and colored) creates effects impossible with debossing alone.
5. Thick, stable materials
Substrate can support raised elements without falling apart.
6. Gift or special items
Wedding invitations, gift boxes, special editions where presentation matters most.
Common Mistakes to Avoid
These screw things up:
1. Design too detailed
Tiny text or complex patterns don’t transfer. Keep designs simple with clear lines.
2. Wrong material
Trying to emboss thin paper or deboss stretchy fabric. Test first.
3. Ignoring material direction
Paper has grain. Embossing across grain can crack it. Deboss with the grain when possible.
4. Lines too thin
Lines too skinny won’t form right. Need 0.5mm minimum line width usually.
5. Not thinking about volume
Setup costs make these expensive for small runs (under 500 units typically).
6. Forgetting margins
Embossing near edges causes buckling. Leave space.
7. One size fits all thinking
Different materials need different approaches. What works for paper boxes might bomb on fabric bags.
Working with procurement outsourcing partners? Communicate these technical things clearly to avoid expensive mistakes.
Final Thoughts on Deboss vs Emboss
Neither’s automatically better. Each has strengths.
Pick debossing for: Durability, subtle class, saving money, thinner materials, things people handle constantly.
Pick embossing for: Visual impact, luxury vibe, light-colored stuff, retail shelf presence, special occasions.
Both work for: Premium branding, tactile experiences, adding value without color, memorable unboxing.
Test both on your real materials before production. What looks amazing in theory might fail with your actual substrate and design.
Need help picking which technique fits your product? Get in touch and we’ll look at your requirements. Ready to start production with custom embossing or debossing? Book a consultation and let’s talk materials, costs, and suppliers who deliver quality.
Understanding deboss vs emboss helps you make smarter packaging decisions. Right choice enhances your brand while staying in budget.